PowerPoint (and Google Slides) are ubiquitous in modern business, but techniques such as properly scaling images are not. This post is a quick guide on scaling images without distorting those images.

For example, the image on the left is taken from a real pitch deck. From the shape of the man’s head it is clear this image has been resized, but in doing so the image has been distorted. Squished.

If you right-click the image and choose “Size and Position” or double click the image and click the rectangle+arrow control, you’ll be shown the controls to change the size of the image.
Note how the height is 91% of the original but the width is only 70%. That is the problem.
You can fix this in one of two ways. Simplest is to just hit Reset, which will reset the image to 100% width and height. Then resize again, but before you do that, make sure the “Lock aspect ratio” checkbox is set, so that as you resize, the height and width are adjusted proportionally.
The other way to fix is to uncheck “Lock aspect ratio”, manually edit either the height or width to match the other value, then re-check “Lock aspect ratio”

The image to the left is the result of that fix. The man no longer looks squished.
However, most likely the image no longer fits in the space it’s been placed. It’s either too tall or too wide, which is why it was resized in the first place.
That fix is easy. You just need to “crop” the image.
Click on the image to pull up the image controls. Just past halfway you’ll see a square with a diagonal line running through it labeled “Crop”. Click on that.

Clicking “Crop” will put PowerPoint into cropping mode, shown by thick black lines in the corners and on the edges of the image.
Click and drag any of those black lines to cut off parts of the image you don’t need.
You can also click and drag the image itself to move it around within the cropped area.
For this particular image, cropping lets you hide the finger that is covering up some of the left side of the image.
And cropping often lets you better highlight the important part of the image, especially cutting off unnecessary details on the edges of the images.
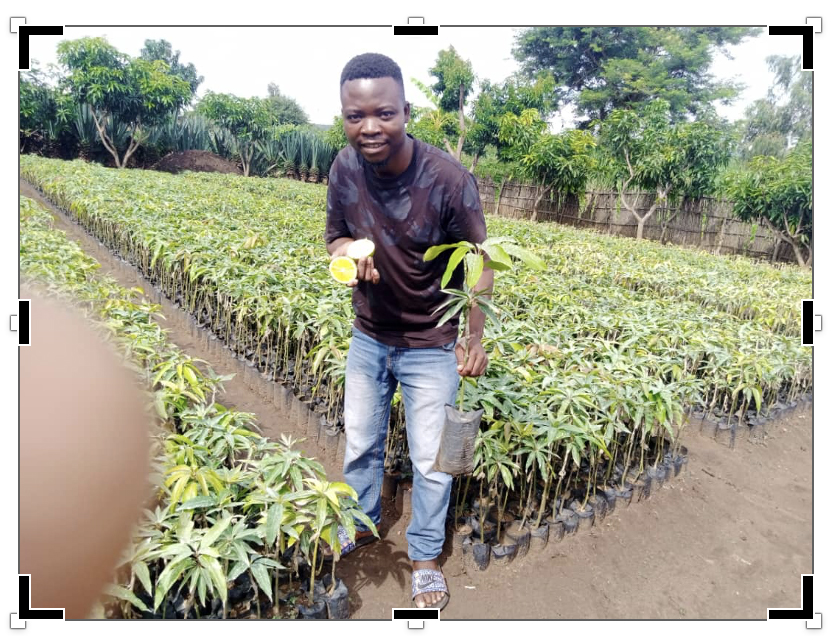
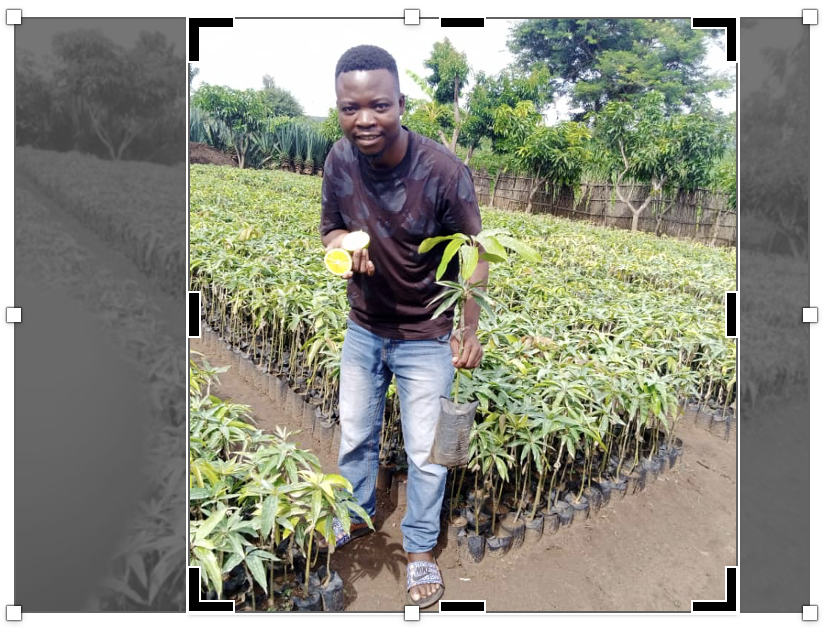
Properly resizing images is especially important within pitch decks on the team slide. Far too often I get images like the one below on the left, squished because the original image in the middle is too wide. Ten seconds of cropping, and the result is the image on the right, which is not only not distorted, but also removes the unnecessary detail on the right side of the original image.


Lastly, resizing and cropping is the key to slides that are covered with one big image. For example, you want to fill the slide (or most of the slide) with the image below (which I again found in a real world pitch deck, but distorted). Simply resize the image to be big enough to cover the whole slide, then crop it so that the edges match the edges of the slide. If you want to leave space for a title or some text underneath, click and drag the crop control at the top or bottom of the image.

Once you get used to the crop tool, it takes just seconds to resize and crop an image. Given how images make for better pitch decks and sales deck and newsletters, spend a half hour practicing this technique, as you’ll be using it a lot once you know it exists.